The Munin's generated web pages are very old fashioned and dull. Its design uses tables with small text and too much spaces. This guide will show how to change the Munin's template and should be continuation of Setup Munin on CentOS 7 with nginx. There will be two alternative Munin 2.x templates will be shown here:
1. Munin Dynamic Template
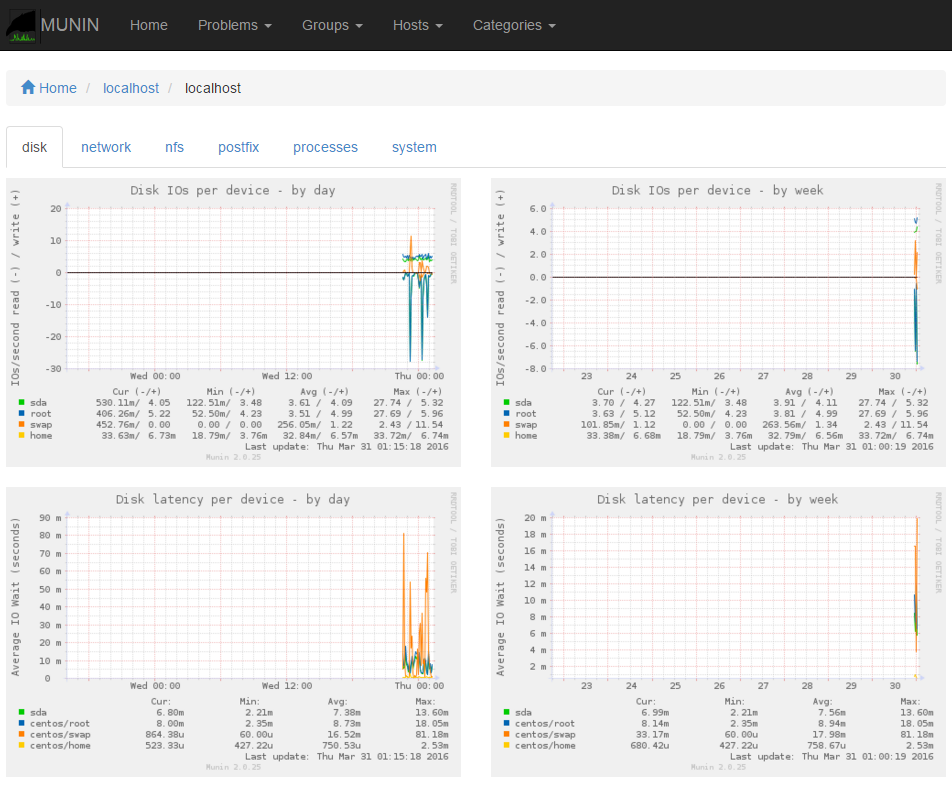
This alternative template uses jQuery and Twitter Bootstrap for Munin 1.x and 2.x versions that enhanced user experience and improve web pages' appearance. The following are the steps to setup this template:
-
Download the template:
cd /opt/ git clone https://github.com/DaveMDS/munin_dynamic_template.git -
Open your custom Munin configuration file:
vi /etc/munin/conf.d/00-munincustom.conf... and append the script below:
tmpldir /opt/munin_dynamic_template/munin2 staticdir /opt/munin_dynamic_template/munin2/static -
Restart the spawn-fcgi-munin-html CGI:
service spawn-fcgi-munin-html restart -
Open the nginx configuration for munin.yoursite.com:
vi /etc/nginx/sites-available/munin.yoursite.com.conf... and replace the content with the following script:
server {
  listen XXX.XXX.XXX.XXX:80; # IPv4
  listen [XXXX:XXXX::XXXX:XXXX:XXXX:XXXX]:80 ipv6only=on; # IPv6
  server_name munin.yoursite.com;

  location / {
    fastcgi_split_path_info ^(/)(.*);
    fastcgi_param PATH_INFO $fastcgi_path_info;
    include fastcgi_params;
    access_log off;
    error_log /var/log/munin/munin-nginx-html-error.log error;
    fastcgi_pass unix:/var/run/munin/fcgi-munin-html.sock;
    auth_basic "Restricted";
    auth_basic_user_file /etc/nginx/.htpasswd-users;

    # Serve static files
    location /static/ {
      alias /opt/munin_dynamic_template/munin2/static/;
    }

    # Munin CGI graph
    location ^~ /munin-cgi/munin-cgi-graph/ {
      access_log off;
      fastcgi_split_path_info ^(/munin-cgi/munin-cgi-graph)(.*);
      fastcgi_param PATH_INFO $fastcgi_path_info;
      fastcgi_pass unix:/var/run/munin/fcgi-munin-graph.sock;
      include fastcgi_params;
    }
  }
}
Note: Change the XXX.XXX.XXX.XXX and XXXX:XXXX::XXXX:XXXX:XXXX:XXX with your server's IPv4 and IPv6 addresses respectively.
-
Restart nginx:
systemctl restart nginx -
Check your Munin web interface and should look something like this:
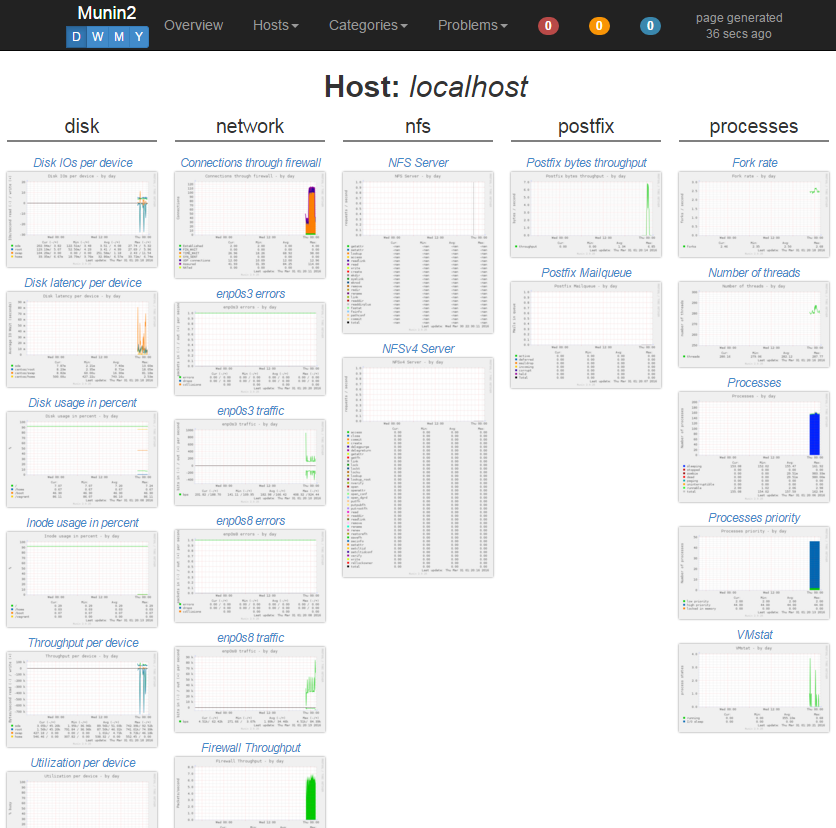
2. Munstrap
Another alternative Munin 2.x templates also based on Twitter Bootstrap 3. The following steps will show how to setup this template:
-
Download the template:
cd /opt/ git clone https://github.com/jonnymccullagh/munstrap.git -
Open your custom Munin configuration file:
vi /etc/munin/conf.d/00-munincustom.conf... and append the script below:
tmpldir /opt/munstrap/templates staticdir /opt/munstrap/static -
Restart the spawn-fcgi-munin-html CGI:
service spawn-fcgi-munin-html restart -
Open the nginx configuration for munin.yoursite.com:
vi /etc/nginx/sites-available/munin.yoursite.com.conf... and replace the content with the following script:
server {
  listen XXX.XXX.XXX.XXX:80; # IPv4
  listen [XXXX:XXXX::XXXX:XXXX:XXXX:XXXX]:80 ipv6only=on; # IPv6
  server_name munin.yoursite.com;

  location / {
    fastcgi_split_path_info ^(/)(.*);
    fastcgi_param PATH_INFO $fastcgi_path_info;
    include fastcgi_params;
    access_log off;
    error_log /var/log/munin/munin-nginx-html-error.log error;
    fastcgi_pass unix:/var/run/munin/fcgi-munin-html.sock;
    auth_basic "Restricted";
    auth_basic_user_file /etc/nginx/.htpasswd-users;

    # Serve static files
    location /static/ {
      alias /opt/munstrap/static/;
    }

    # Munin CGI graph
    location ^~ /munin-cgi/munin-cgi-graph/ {
      access_log off;
      fastcgi_split_path_info ^(/munin-cgi/munin-cgi-graph)(.*);
      fastcgi_param PATH_INFO $fastcgi_path_info;
      fastcgi_pass unix:/var/run/munin/fcgi-munin-graph.sock;
      include fastcgi_params;
    }
  }
}
Note: Change the XXX.XXX.XXX.XXX and XXXX:XXXX::XXXX:XXXX:XXXX:XXX with your server's IPv4 and IPv6 addresses respectively.
-
Restart nginx:
systemctl restart nginx -
Check your Munin web interface which should look something like this:
Comments
Re: Munin template on Apache
Yes the Munin dynamic template will work on Apache except for the script/configuration files specific for nginx (you might want to figure it out yourself for the Apache equivalent).
Munin template on Apache
Hi
Do you think it would work on a apache server?
Ive had some work with fast-cgi on munin-2-beta and that didnt work so I'm not shure that I can modify it myself..
But I think I will have a go.